Widget Creation
The initial Hyvä Commerce admin dashboard view is a blank canvas that invites you to begin adding widgets - something which can be distilled into the following process:
1. Click the Add Widget Button
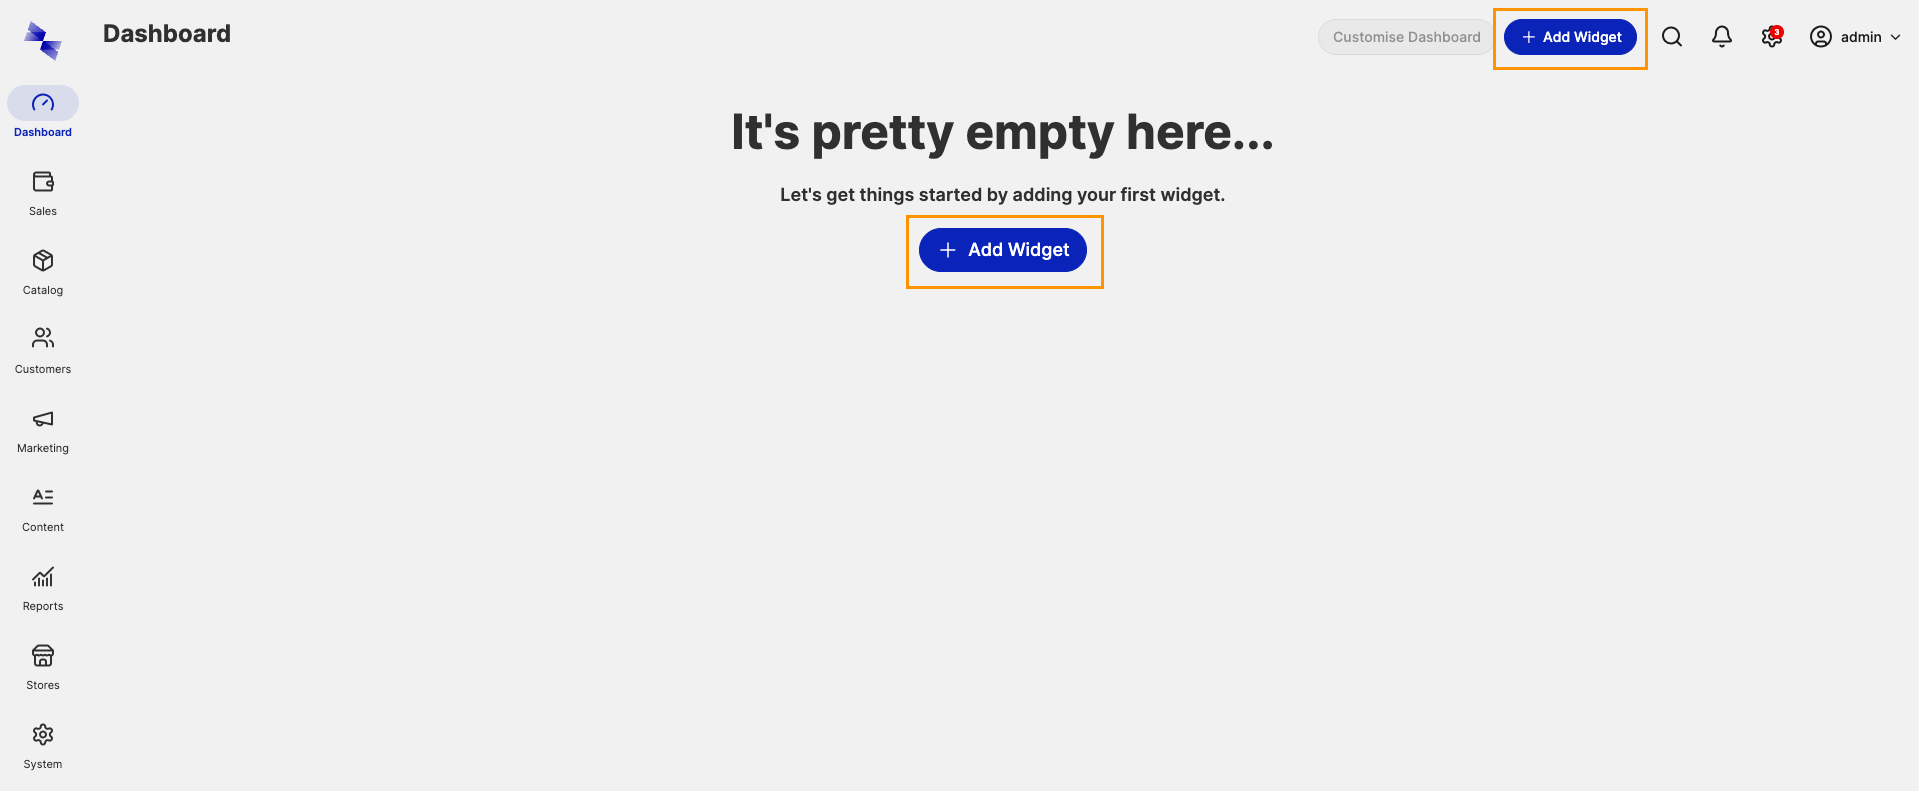
The Add Widget button can be found in two locations: at the bottom of an empty dashboard and in the top right hand
corner of the page. The button at the bottom of the dashboard is not present when the dashboard contains widgets but the
one in the top right hand corner is a permanent fixture.
2. Select Your Widget
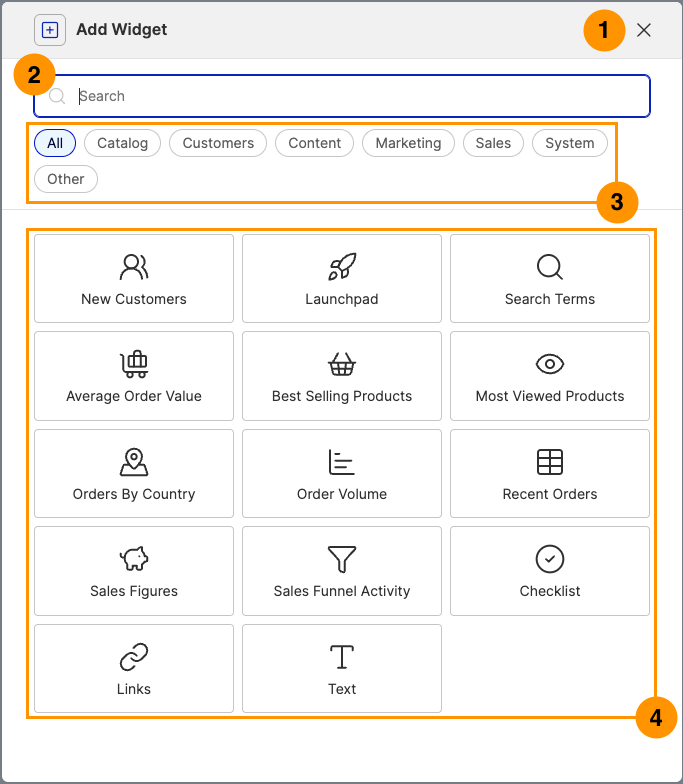
After clicking the Add Widget button, you are presented with a modal which shows the various widget types available to
your admin account. This modal contains 4 key elements for you to interact with:
- Close Button
- Widget Search
- Widget Category Filters
- Widget Type Buttons
Widget Search
A search feature is provided to help facilitate finding specific widgets or widgets for certain topics. As you type into the search bar, the content beneath it updates in real time to show only widgets which relate to the search term. By default, widgets will match the search term when:
- Its name contains the search term
- Its category contains the search term
- Any of its tags contain the search term
Widget Tags
Widget providers may choose to "tag" their widgets with a set of terms or topics to provide an additional layer of categorization.
Widget Category Filters
Widgets can be categorised. The widget selection modal displays each category as a button which, when clicked, will filter the list of widgets to show only those belonging to that category.
Uncategorised widgets are grouped together into a separate category. By default, this is named Other but may differ in
your particular instance.
Developer Notes
More information about widget categories can be found in our developer documentation.
Widget Type Buttons
Each button relates to a specific widget type. Clicking any of these buttons will allow you to configure a widget of the given type.
Widget Permissions and Availability
Not all widgets are available to all admin user accounts. Some widgets may require an admin user account to have a specific role or access to a specific resource before being allowed to create, update, edit, or view widgets of that type. More information about admin user roles and resources is available in the official Magento documentation.
3. Complete the Widget Configuration
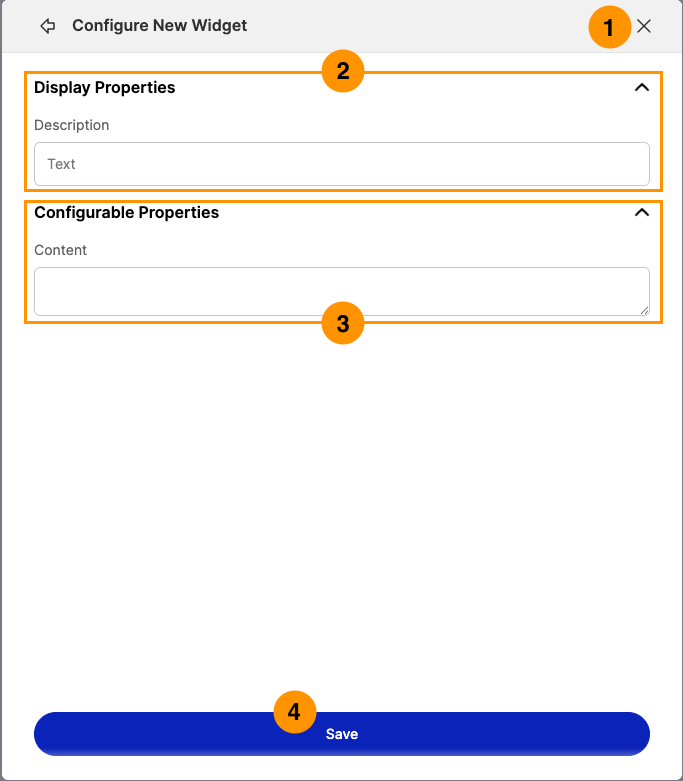
After selecting which widget to configure, you are presented with a second modal - this time containing the widget's configuration form. The typical widget configuration form will have 4 key elements for you to interact with:
Display Property Configuration
Display properties typically provide a level of control for how the widget appears. Each widget type will have a different set of options available. Simply work your way through the options, specifying your desired configuration for each available option.
Collapsible Configuration
Clicking the Display Properties heading will collapse and expand that section of the configuration modal.
Configurable Property Configuration
Configurable properties typically provide a level of control for how the widget behaves. Each widget type will have a different set of options available. Simply work your way through the options, specifying your desired configuration for each available option.
Collapsible Configuration
Clicking the Configurable Properties heading will collapse and expand that section of the configuration modal.
Save Button
Once the widget has been configured, simply click the Save button to add it to your dashboard.
Editing Widget Configuration
Widgets are not set in stone once they have been created - you are free to edit their configuration at any time.